Surface sampling swabbing method for microbiology tests
- Published on: Oct 27, 2017
1. PURPOSE
The purpose of this document is to describe the Microbiological Swabbing Method to be used to determine the microbiological contamination on equipment surfaces such as tanks.
2. SCOPE
The method used for swabbing/sampling and the laboratory procedure used for determination of counts and recovery.
3. ABBREVIATIONS
3.1. cfu/CFU – colony forming units
3.2. NMT – not more than
3.3. TSA – Tryptone Soy Agar
3.4. TSB – Tryptone Soy Broth
3.5. PPE – Personal Protective Equipment
4. MATERIALS
4.1. Safety
4.1.1 The swabs and other materials used must be, at all times considered potentially hazardous.
4.1.1. Disposable gloves should be worn at all times when handling live cultures.
4.1.2. All work with open live cultures should be performed in a Bio-safety cabinet.
4.1.3. Recommended PPE to be worn.
4.2. Equipment
4.2.1. Incubator, 30 to 35oC
4.2.2. Bio-safety Cabinet
4.2.3. Colony Counter
4.2.4. Vortex mixer
4.2.5. Water bath set at NMT 45oC
4.2.6. 10cm x 10cm nylon template
4.3. Materials
4.3.1. Nylon Regular Flocked Swabs in Tube 80mm Breakpoint, sterile (Copan, Code 552C)
4.4. Media and Reagents
4.4.1. Tryptone Soy Agar, molten at NMT 45oC
4.4.2. Tryptone Soy Broth, 9mL dispensed into 10mL sterile tubes
4.4.3. MacConkey Agar plates, 90mm x 15mm
4.4.4. Pseudomonas-CFC selective agar plates, 90mm x 15mm
4.4.5. 5mL vials of Normal Saline (0.85%), sterile – to be used as diluent
4.4.6. Normal Saline (0.85%), sterile, 2mL dispensed into 10mL sterile tubes
4.4.7. 70% Isopropyl Alcohol
210 SOPs, 197 GMP Manuals, 64 Templates, 30 Training modules, 167 Forms. Additional documents included each month. All written and updated by GMP experts. Checkout sample previews. Access to exclusive content for an affordable fee.
5. SAMPLING METHOD
5.1. Swabbing/ Sampling Method of a 10cm x 10cm Flat Surface (100cm2)
5.1.1. The swab is aseptically pre-moistened no more than 2 hours prior to use by a Technician in a Bio-safety cabinet.
5.1.2. Aseptically remove the swab from the plastic applicator tube, being careful not to touch the shaft or the swab tip. Ensure that the plastic tube is also kept clean, sterile and handled as little as possible.
5.1.3. The swab is moistened with the sterile diluent and pressed against the side of the diluent bottle to remove the excess diluent, leaving the swab moist, not saturated.
5.1.4. Return the swab aseptically to the plastic applicator tube.
5.1.5. Place the required amount of pre-moistened swabs into a sealed plastic pouch for transport to and from the QC Microbiology Laboratory.
5.1.6. The swabs are then transported immediately to the sampling area for use by the production technician.
5.1.7. The production technician must then aseptically remove the swab from the plastic applicator tube, being careful not to touch the shaft or the swab tip. Ensure that the plastic tube is also kept clean, sterile and handled as little as possible.
5.1.8. A 10cm x 10cm nylon template that has been wiped down with 70% Isopropyl Alcohol before use is placed over the area to be sampled to ensure that the correct surface area is swabbed.
5.1.9. The moistened swab is placed on the test site and sampled across the entire selected surface.
5.1.10. The swab is held at a slight angle to the surface and moderate pressure is applied.
5.1.11. The angle and pressure should be such as to allow as much contact between the swab head and surface as possible, without damaging the swab or shaft.
5.1.12. The surface should be sampled using parallel strokes from right to left (horizontally) from top to bottom of sampling area, rolling the swab approximately 180 degrees in a clockwise direction, ensuring the previously swabbed area is slightly overlapped. Ensure that the entire surface of the swab head comes into contact with the surface.
5.1.13. Repeat the same procedure vertically, i.e. at 90 degrees to the initial swabbing.
5.1.14. Repeat the same procedure diagonally, i.e. at 45 degrees to the initial swabbing.
5.1.15. The swab is to be returned aseptically to the plastic applicator tube for transport to the QC Microbiology laboratory for further processing.
5.2. Swabbing/ Sampling Method of an Irregular Surface/ Crevice
5.2.1. Proceed as in sections 5.1.1, 5.1.2, and 5.1.4 to 5.1.6.
5.2.2. As much of the relevant surface as possible is to be swabbed.
5.2.3. The swab is to be returned aseptically to the plastic applicator tube for transport to the QC Microbiology Laboratory for further processing.
6. LABORATORY PROCEDURE
6.1. Receipt and Storage
6.1.1 Swab samples are to be signed in and assigned a unique Quality Control Department sample number.
6.1.2 If swabs cannot be processed immediately, then the swabs must be kept at 2 to 8oC for NMT 24 hours after sampling.
6.2. Swab Recovery
6.2.1. While in a Bio-safety cabinet, place the swab into a sterile tube containing 2mL sterile saline.
6.2.2. Aseptically break off the portion of the swab handle that was touched by the gloved hand.
6.2.3. Vortex the tube at high speed for 2 minutes in 10 second bursts.
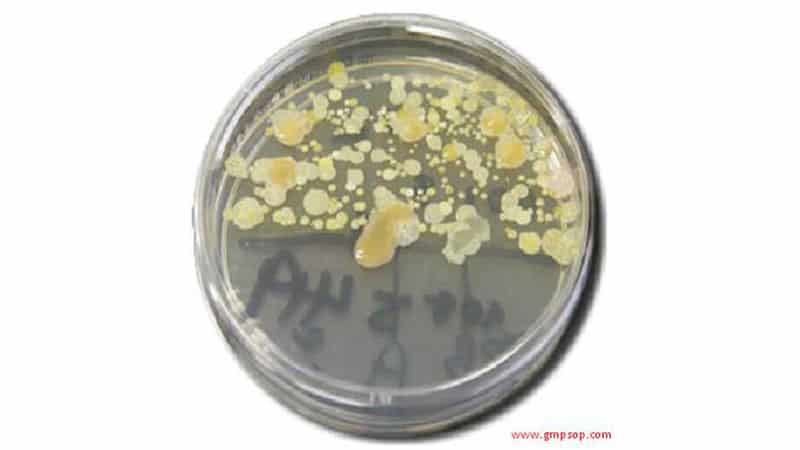
6.2.4. Transfer 1mL of the liquid content of the swab tube to a sterile 90mm Petri dish, add approximately 20mL molten TSA media to the plate, swirl to mix and distribute the sample.
6.2.5. Allow the TSA to cool down and solidify, then invert.
6.2.6. Incubate the inverted plates at 30 to 35oC for NMT 5 days.
6.2.7. Count and record the number of CFU present, using a Colony Counter, if necessary.
6.2.8. Add 0.5mL of the remaining liquid content of the vortexed tube to 9mL of TSB in a sterile tube and incubate (enrichment step) at 30 to 35oC for 5 days.
6.2.9. After incubation, streak out 0.1mL of the broth onto Pseudomonas-CFC selective agar plates and MacConkey Agar plates to check for presence/absence of Coliforms/pseudomonads.
6.2.10. Incubate the Pseudomonas-CFC selective agar plates at 20 to 25oC for 48 hours.
6.2.11. All grown colonies are suspect Pseudomonas spp. and are counted as such.
6.2.12. Confirm the identification of the colonies using Gram staining and the Vitek II system.
6.2.13. Incubate the MacConkey Agar plates at 37±1oC for 48 hours.
6.2.14. All grown colonies are suspect Coliforms and are counted as such.
6.2.15. Confirm the identification of the colonies using Gram staining and the Vitek II system.
6.3. Swab Negative Control
6.3.1. At the same time inoculate a separate swab directly with the sterile diluent used to moisten the test swab, with the same volume (0.1mL) as was used on the test swab.
6.3.2. Proceed as in section 6.2.1 to 6.2.10.
6.3.3. Incubate the inverted plate at 30 to 35oC for NMT 5 days.
6.3.4. Count and record the number of CFU present, if any.
6.4. Absence/Presence of Coliforms and Pseudomonads
6.4.1. If any bacterial colonies are recovered from the TSA pour plates in section 6.2, streak each colony onto Pseudomonas-CFC agar and MacConkey agar plates to confirm presence or absence of Pseudomonads and Coliforms.
6.4.2. Incubate the Pseudomonas-CFC agar plates at 20 – 25oC, and the MacConkey agar plates at 37±1oC for 48 hours respectively.
6.4.3. All colonies recovered on the streak plates in 6.4.2 are to be identified using Gram staining and the Vitek II system.
7. ACCEPTANCE CRITERIA
7.1.1. NMT 400 CFU per 100cm2
7.1.2. Absence of Coliforms and Pseudomonads
8. RESULTS
8.1. Swab counts
8.1.1 All results are entered into the data worksheet which will facilitate the reporting and trending of collected Microbiological swabbing data.
8.1.2 Calculate the final microbial count by multiplying the actual number of colonies present on the TSA pour plates (section 6.2) by a factor of 2 to give a final count in cfu/100cm2.
Related Posts

Evaluation of Contaminant Options for Packing of Solid Dosage Forms
Nine steps for creating a Master Validation Plan
How to conduct a root cause investigation using DMAIC principle


I really like уour blog. very nice colors and thеme.
Did you create this website үourself oг did you hire ѕomeone to do it for you?
Plz answer back as I’m looking to create my own blog and ԝould
like to know ԝheгe u got tһis from. thank you