Instrument calibration procedure for pharmaceutical industry
- Published on: Mar 23, 2024
Have you ever wondered if the scales at the grocery checkout show the right amount?
Or how are the cameras used on the highways to catch overspeed drivers doing their job correctly?
The answer is instrument calibration. Any measuring instrument that counts speed or weight must be calibrated at regular intervals to prove the instrument produces results accurately within its normal range or tolerance. Without the regular calibration, the results are likely to be questionable.
The same principle can be applied to pharmaceutical instruments, especially those directly impacting product quality and safety.
This article will discuss the general requirements for instrument calibration used in production and laboratory testing, which may affect pharmaceutical products’ identity, strength, quality, or purity.
We will also discuss how to prepare an instrument calibration master schedule, risk-based determination of calibration intervals, and calibration procedure of pH Meter.
What is instrument calibration?
In simple terms, instrument calibration is a set of checks to determine how accurately an instrument or measuring system operates compared to a known standard.
For example, your laboratory has several scales for measuring the weight of raw materials or bulk tablets.
To ensure the scales are measuring accurately, you might compare it to a standard weight you know is correct, like calibration standards in milligrams.
By making this comparison, you can determine whether your scale is measuring correctly and, if not, adjust it to make it accurate again.
Which instruments need calibration?
All instruments which have a critical or direct impact on product quality require calibration.
You should establish a written procedure describing the processes for reviewing all your instrument and their function and agreeing on which are critical and require calibration.
You can find the list of instruments/equipment prepared during the initial qualification of a facility or laboratory.
A suitable rationale for determining an instrument as critical is that it has the potential to;
– Affects the safety, quality, or efficacy of a product.
– Alter the physical, chemical, or biological properties of a product.
– If certification is a local mandatory requirement (e.g., pressure vessel testing)
You may use alternative rationales for determining criticality, such as the ‘direct impact’ approach described in the ISPE/GAMP Good Practice Guide: Calibration Management.
240 SOPs, 197 GMP Manuals, 64 Templates, 30 Training modules, 167 Forms. Additional documents included each month. All written and updated by GMP experts. Checkout sample previews. Access to exclusive content for an affordable fee.
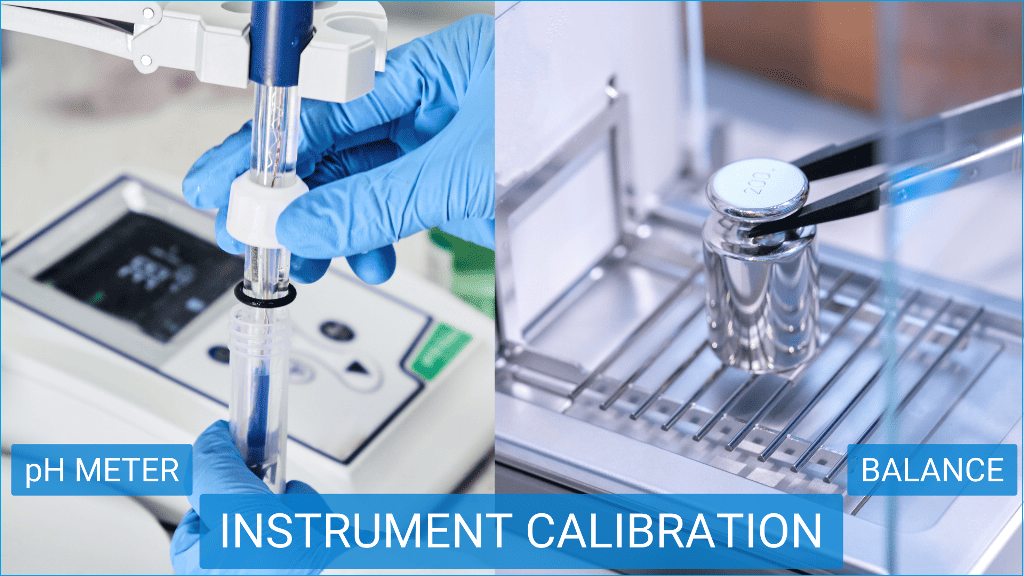
Examples of laboratory instrument calibration procedures
Calibration Instructions:
i. Use buffer solutions with known pH values (e.g., pH 4.0, pH 7.0, and pH 10.0).
ii. Immerse the pH electrode in each buffer solution and allow it to stabilize.
iii. Adjust the meter to match the known pH value of each buffer solution.
iv. Rinse the electrode with distilled water between each calibration point.
Calibration Instructions:
i. Use calibrated weights of known mass (e.g., 1 mg, 10 mg, 100 mg, etc.).
ii. Place the weights on the balance or scale and record the displayed value.
iii. Adjust the balance or scale to match the known mass of each weight.
iv. Perform calibration at various points across the balance or scale’s range.
Calibration Instructions:
i. Use a calibrated reference thermometer or temperature bath with known temperatures.
ii. Immerse the sensor or thermometer probe into the reference standard.
iii. Allow time for stabilization and ensure good thermal contact.
iv. Adjust the instrument’s readings to match the known temperature of the reference standard.
Calibration Instructions:
i. Use a calibrated pressure source or deadweight tester with known pressure values.
ii. Connect the pressure gauge to the calibration equipment.
iii. Apply pressure in increments across the gauge’s range.
iv. Compare the readings of the pressure gauge with the known pressure values and adjust if necessary.
Calibration Instructions:
i. Use standard conductivity solutions with known conductivity values.
ii. Immerse the conductivity probe in each standard solution.
iii. Allow time for stabilization and ensure proper probe immersion.
iv. Adjust the meter’s readings to match the known conductivity of each standard solution.
Calibration Instructions:
i. Use certified optical density filters with known absorbance values.
ii. Place the filters in the spectrophotometer’s sample compartment.
iii. Measure the absorbance of each filter at the specified wavelength.
iv. Adjust the instrument’s readings to match the known absorbance values of the filters.
Calibration Instructions:
i. Use certified reference standards for each parameter (e.g., flow rate, pressure, wavelength).
ii. Run calibration tests according to the instrument manufacturer’s guidelines.
iii. Adjust system settings and parameters to ensure accurate performance across the specified range.
Calibration Instructions:
i. Use calibrated thermocouples or temperature data loggers placed at various locations within the autoclave chamber.
ii. Run a sterilization cycle according to standard operating procedures.
iii. Monitor and record temperature and pressure throughout the cycle.
iv. Compare the recorded data with the specified sterilization parameters and adjust if necessary.
Calibration Instructions:
i. Use calibrated temperature probes or data loggers placed inside the incubator.
ii. Set the incubator to the desired temperature.
iii. Monitor and record temperature stability over a specified period.
iv. Adjust the incubator’s temperature settings to match the desired value if needed.
Calibration Instructions:
i. Use calibrated reference standards or dissolution calibration kits.
ii. Fill dissolution vessels with a standard solution according to the test method.
iii. Run the dissolution test and compare the results with the expected dissolution profile.
iv. Adjust the instrument’s settings or calibration factors if necessary to meet the acceptance criteria.
Calibration Instructions:
i. Use certified reference standards for each analyte of interest.
ii. Inject known concentrations of the reference standards into the chromatograph.
iii. Run the chromatographic analysis and compare the results with the expected retention times and peak areas.
iv. Adjust instrument parameters such as flow rate, temperature, and detector sensitivity if needed.
Calibration Instructions:
i. Use certified viscosity standards covering the expected viscosity range.
ii. Fill the viscometer with each standard solution and measure the viscosity.
iii. Compare the measured viscosity with the known values and adjust the instrument’s calibration if necessary.
Calibration Instructions:
i. Use certified refractive index standards.
ii. Place a drop of each standard solution on the refractometer prism and measure the refractive index.
iii. Compare the measured refractive index with the known values and adjust the instrument’s calibration if needed.
Calibration Instructions:
i. Use certified TOC standards with known concentrations.
ii. Inject known concentrations of TOC standards into the analyzer.
iii. Measure the TOC levels and compare the results with the known concentrations.
240 SOPs, 197 GMP Manuals, 64 Templates, 30 Training modules, 167 Forms. Additional documents included each month. All written and updated by GMP experts. Checkout sample previews. Access to exclusive content for an affordable fee.

How to determine instrument calibration schedule?
You must prepare an instrument calibration schedule to ensure that all your instruments that directly or indirectly impact product quality are calibrated at planned intervals.
Initially, you will calibrate a new instrument on the manufacturer’s recommendation to maintain accuracy. Later, you can analyze the calibration data and other risks to determine the best interval for future calibrations.
As a best practice, you should calibrate instruments with rough precision at least annually, but adjustments may be made if data shows faster accuracy degradation.
In the calibration schedule, you can apply calibration intervals to individual instruments or groups of similar instruments based on their function and responsibility.
Calibration intervals can be fixed or variable, depending on equipment and usage. You can determine Calibration intervals based on calendar time, cumulative usage, or other suitable criteria to ensure the equipment maintains accuracy.
The calibration range and accuracy should include the normal process parameter values and expected variability. While assigning calibration intervals, please ensure there is a high probability that equipment remains within specified accuracy limits.
You can assign a standard grace period in the calibration schedule to ensure timely maintenance.
For example, annual calibrations will be performed every 365 days ± 10 days. Semi-annual calibrations will be performed every 182 days ± 5 days. Quarterly calibrations will be performed every 91 days ± 5 days.
Although rare, you can allow temporary calibration interval extensions beyond the standard grace period due to critical tests, delays in production schedules, or other requirements, provided that the length of the extension is limited (i.e., one extension per calibration interval).
Instrument calibration interval calculator
Imagine that you own hundreds of instruments that need to be calibrated regularly.
But as you know, not every instrument is equally important or has the same effect on operations.
For example, the results of quality control tests are more directly impacted by devices such as laboratory precision scales than by rough scales used in warehouses to weigh bulk raw materials.
You need to calibrate both measuring instruments. However, they should have different calibration intervals.
For instance, the rough scales can be calibrated every three months.
However, some laboratory precision scales must be adjusted daily.
We have developed a risk-based calibration interval calculator to help you determine how often various instruments need to be calibrated.
The calculator can determine the calibration interval through appropriate risk assessment.
Use the calibration risk calculator below.
Factors to consider in instrument calibration program
a. SOP for instrument calibration:
Instrument calibration is important for pharmaceutical manufacturing standards.
You must train your staff, who should be allowed to perform calibration. Their performance should be monitored regularly through self-inspections or audits.
You must establish standard operating procedures (SOP) explaining how to calibrate and maintain each instrument. These SOPs should cover the following:
– Identifying which equipment needs calibration.
– Setting up requirements for calibration throughout the instrument’s life.
– Describing the process for calibrating instruments.
– Handling situations where equipment doesn’t meet the required standards and what to do to fix it.
– Reviewing trends, like calibration failures or how often repair and maintenance are needed.
– Ensuring only calibrated and properly maintained equipment is used.
– Deciding when the instrument is okay to use.
– Using outside contractors for calibration and maintenance.
– Keeping records of all calibration and maintenance activities.
b. Instrument calibration master register:
Before preparing the instrument calibration procedure, you should study the specifications of the instrument in question.
Establish a master instrument calibration register with unique identification, manufacturer details, locations, serial number, calibration frequency, and comprehensive instrument history.
A typical instrument calibration history file contains information such as:
– Instrument identification.
– Instrument manufacturer, model, and serial number, if available.
– Instrument type (e.g., thermometer, pressure gauge).
– Instrument classification (e.g., critical, non-critical, major, minor).
– I’m referring to the calibration procedure(s) for the instrument.
– Instrument location.
– Type and accuracy requirements of the standard(s) to be used.
– Calibration frequency.
– Limits for accuracy and precision.
– Calibration range.
– Calibration test points.
– I’d like to point out specific environmental conditions for calibration, if applicable.
– Calibration records; and
– Repairs and service records.
You should be able to establish the required accuracy, precision, normal operating range, acceptable tolerance levels, and stability requirements from the instrument specification.

240 SOPs, 197 GMP Manuals, 64 Templates, 30 Training modules, 167 Forms. Additional documents included each month. All written and updated by GMP experts. Checkout sample previews. Access to exclusive content for an affordable fee.
c. Record-Keeping in instrument calibration:
You must keep all records every time you conduct an instrument calibration.
This involves recording detailed calibration data, including initial and final results, as well as comparing these results against the specified requirements.
You should identify and document the instrument ID, date and time of calibration, units of measurement, the standards used, the steps taken during calibration, and environmental conditions.
Look for the signatures of the personnel involved in the calibration process.
These calibration records will serve as the supporting evidence for ongoing review and verification of the instrument’s accuracy.
d. Management of calibration status:
You must track the calibration status of all instruments in the master register to build confidence in instrument reliability and accuracy.
After each successful calibration, label the instrument with its calibration status, indicating the date of calibration, the next due date, and the initials of the personnel who conducted the calibration.
Always remind your staff to verify the calibration status before using the instrument in laboratory or production operations.
If an instrument is found overdue for calibration, immediately put an out-of-calibration notice on it and refrain from using it until the next successful calibration.
Raise a deviation as soon as practicable. If necessary, conduct a thorough investigation.
List how many times the instrument was used after the calibration was due. Quarantine those batches to prevent them from moving further into operation.
Conduct risk assessment and identify and mitigate any potential impact on products or processes.
Document the process in the instrument calibration register and the instrument history file.
e. Environmental factors in instrument calibration:
You must ensure that the calibration environment suits the instrument and the standards used.
To maintain the accuracy of measurements, you must control environmental factors such as temperature, humidity, vibration, cleanliness, radio frequency, and electromagnetic forces.
Please remember that it is good practice to perform the calibration in a location other than where the instrument is used only if it is unaffected by relocation or the locations are equivalent.
f. How do you manage calibration standards?

After completing a calibration, put away the calibration standards in a secure location to prevent unauthorized adjustments and meet the storage requirements for the standard.
Ensure the accuracy of the calibration standard is at least equal to the accuracy of the instrument being calibrated.
You must not use calibration standards, primary or secondary unless the standard provider provides the calibration certificate and the supporting raw data.
Generate a calibration certificate based on supporting raw data when using in-house calibration standards.
The certificate should include, and should not be limited to:
– Description of the standard.
– Date the standard was established.
– Signature of the person preparing the standard.
– The date standard must be recertified or replaced.
– Handling or storage conditions for the standard.
– Reference to a method or SOP used to establish the standard; and
– Accuracy (or purity for chemical substance) and precision of the standard.
You must calibrate all instruments using accurate, stable measuring tools that cover the full range needed to check that the instrument is calibrated within its specified limits.
When possible, perform calibration using standards that are at least four times more accurate than the device being tested.
These tools should be traceable to the National Institute of Standards and Technology (NIST) or a similar reputed organization.
g. Maintaining quality assurance in instrument calibration:
Regular review of calibration records is necessary to ensure compliance with standard operating procedures (SOPs) and to identify any deviations or areas for improvement.
Any calibration frequency or tolerances changes should be approved by the appropriate quality assurance authorities and based on factors such as in-use reliability, experience, and calibration history.
Effective communication with calibration service contractors and adherence to their SOPs are essential to maintaining calibration quality.
Demonstration – Calibration procedure of pH Meter in laboratory

In the following section, we will demonstrate a simple calibration procedure of a pH meter typically used for the determination of the pH of a solution in a laboratory.
The Two-Point Calibration is to be performed before each use or once the meter is used daily.
Before you begin, please make sure you have a container of water to rinse the probe between the two buffer solutions during the calibration.
If you have deionized water, distilled water, or RO water (reverse osmosis), any of these are preferred to tap water. However, you may use tap water if necessary. Also, have some paper towels nearby to dab the probe after rinsing.
Also, please take appropriate safety precautions, such as:
– Wear personal protective equipment (i.e., gloves, safety glasses, safety clothing).
– Consult the relevant MSDS for the solutions before handling the chemicals and reagents.
– A strict aseptic technique must always be used when handling live organisms.
For this demonstration, in addition to the pH Meter, you will need the following materials.
– Storage solution for pH probes (2M KCl).
– pH 7.0 buffer solution or equivalent, +/- 2 @ 25°C, Expiry 1 year after bottle is opened.
– pH 4.0 buffer solution or equivalent. +/- 2 @ 25°C, Expiry 1 year after the bottle is opened.
Calibration procedure:
– Open the buffer solution bottles 7 & 4 before beginning calibration.
– Turn the meter on using the “Mode” button. The numbers will appear on the LCD screen.
– Push and hold the “Mode” button until “OFF” and “CAL” are displayed, then release the button immediately once you see “CAL” on the display screen.
– The meter will display “7.0 USE”. (Asking for Buffer 7)
Remove the electrode from the 2M KCl storage solution, rinse it with purified water into a waste container, and dry it with a tissue.
– When drying the electrode, DO NOT WIPE, as wiping can induce an electrostatic charge, making the electrode slow to respond.
– Immerse the probe into the requested Buffer 7 and gently agitate the probe in the Buffer solution.
– When the meter recognizes Buffer 7, it will display “4.0 USE”. (Asking for Buffer 4)
– To prevent contamination of the buffers, quickly rinse the bottom of the probe with water and shake it or dab it dry with a paper towel.
– In both instances, keep your eyes on the display screen to avoid missing the “OK” displayed for buffer recognition.
– Immerse the probe into the requested Buffer 4 and gently agitate the probe in the Buffer solution.
– When the probe recognizes Buffer 4, the meter will display “OK” on the LCD for one second.
– The “OK” appears very briefly and disappears.
– If a good calibration has not occurred, the screen will display “WRNG.” Please repeat the steps.
– Rinse the electrode with purified water and put it in a waste container. Then, immerse the electrode in a 2M KCl storage solution until ready.
– Record the results on the instrument usage log next the pH meter.
240 SOPs, 197 GMP Manuals, 64 Templates, 30 Training modules, 167 Forms. Additional documents included each month. All written and updated by GMP experts. Checkout sample previews. Access to exclusive content for an affordable fee.
Conclusion
Instrument calibration is a critical GMP activity in the pharmaceutical industry.
It ensures accurate measurements of critical instruments and helps maintain product quality and safety.
This process involves comparing instruments against known standards to verify accuracy within specified tolerances.
We rely on some critical instruments to measure with absolute precision and accuracy. These instruments directly impact the product quality and require calibration at regular intervals.
The calibration interval is determined using a risk-based approach, considering factors such as safety, environment, test accuracy, age, location, frequency of use, temperature, humidity, cleanliness, and regulatory requirements.
First, establish a calibration schedule. Conduct the initial calibration based on manufacturer recommendations.
As you generate reasonable data over time, perform assessments based on usage, risk, and equipment performance.
At this point, you can generate in-house instrument calibration procedures with defined calibration intervals.
A risk-based calibration interval calculator aids in determining appropriate calibration frequencies for different instruments, aligning with their impact on operations.
Key considerations in instrument calibration programs include SOP development, maintaining an instrument calibration master register, comprehensive record-keeping, managing calibration status and environmental factors, handling calibration standards, and maintaining quality assurance through regular review and approval processes.
Adhering to the principles outlined in this article can ensure the instruments will generate accurate data.
Please remember that unambiguous data helps maintain regulatory compliance and improve product quality.
If you have more thoughts on this topic please share your idea in the comment section.

Author: Kazi Hasan
Kazi is a seasoned pharmaceutical industry professional with over 20 years of experience specializing in production operations, quality management, and process validation.
Kazi has worked with several global pharmaceutical companies to streamline production processes, ensure product quality, and validate operations complying with international regulatory standards and best practices.
Kazi holds several pharmaceutical industry certifications including post-graduate degrees in Engineering Management and Business Administration.
Related Posts

Document Change Control Process in GMP Environment
How to develop supplier relationship management strategies in GMP
Basic Overview of Contamination Control in GMP Facility


 Procedure for GMP 10")


